Archive | Technique RSS feed for this section

Holiday gift and Decor with Authentique Paper

28 Nov
I have a fun and easy idea to pass on to you today.
I am using some paper from the Wonder 6 x 6 bundle and a plain glass frame.
To start off I cut a frame from a full size piece of Wonder’s, off-white foundation paper.
The frame measures 5″ x 7″.
You can see all the shapes that have been cut out on the left.
I took each paper and put the right side of my cut out to the wrong side of the patterned paper I was using. This is so I do not get pencil marks left over from tracing.
You can see here that I was careful to number and match each patterned paper piece to the pattern piece I was using.
All the pieces are cut out, it is time to get ready for assembly.
Using a paint dabber, I edged all my cut outs and also the frame.
I also took the frame base and edged that with the paint as well.
I covered the frame back with a neutral piece of cardstock to cover the frame clamp holes.
Next I adhered the frame.
I knew I wanted to have the cut outs be slightly raised, so I put dimensional foam down first.
 Here is the first stage of the frame done.
Next, I took some vinyl and cut-out the word JOY.  I used a setting on my cutter that cuts through the vinyl, but not the vinyl backing.  Here you see that I have already cut and removed the excess vinyl and only the word JOY is on the backing.
This might be redundant for those who work with vinyl, but after I did the previous step, I took some mounting film and lifted the word off the vinyl backing.
What you see here is the vinyl attached to the mounting film. the sticky side of the film is on the back of the letters.  The mounting film will release the vinyl, once I attach the vinyl to the frame.
Here I have attached the word to the glass and I am peeling off my mounting film.
Step 2 , you can see below is all done.
Step 3 is optional.  What I did was to embellish the from of the glass further.
I added fibers, lace and beads to bring it all together.
It really is a beautiful piece and fairly easy and quick to make.
You could use this idea for any season or for any occasion based on what paper you use.
I hope you have enjoyed this tutorial and that you can use this idea for the upcoming holiday season.
This has been Jeannie from The Polka Cabana with today’s post.
Supplies used:
Wonder full sized Foundations
Wonder 6 x 6 Bundle
Stampin’ Up! Pretties Kit (no longer available)
Frame .svg – My Crafty Files
Misc trims and fibers.

Extreme Paper Crafting with Authentique Paper and Glue Arts

18 Oct
If you are here for my Sweet Stamps post, click HERE.
Hello all you paper aficionados!
I really am excited to show you what my wild imagination has come up with today.
I am very grateful to Glue Arts for their part in this post.  Without certain products of theirs, this project could have been a disaster.
Here is what I started with for this project.
A bunch of Glowing scraps, polka dot fabric and a made up pattern piece(the white paper.)
The first step is to cut out a bunch of the pattern shapes from the scraps.
Using a machine, sew all pieces together using a 1/4″ seam.
Here is what the pieces look like after they have been sewn together.  Note: all pieces are sewn, right sides together.
Those of you that sew, know that clipping curves can really help when creating curves, this picture shows you what clipping curves looks like.
After the seams are all clipped, turn the piece right side out.
Using my Glue Glider Pro with Perma Tac adhesive, I attached some glowing paper to 1″ chipboard circles. These will become a base on the inside and outside bottoms.
Take a strong thread, I use upholstery thread, and gather the bottom tightly to close.
Take one of the chipboard circles and place it inside the piece.  This is used to help shape the piece and gives a flat surface to put some weights(beans) on top of.
I have my beans wrapped in plastic, just to keep them intact.
On top of the beans, start putting the stuffing in the piece.  Stuff and gather until you are happy with the shape. Gather the top closed in the same manner as the bottom.
To conceal the gathered top, I created lot of different tops using scraps and Glue Arts Raisen’s.
For some of the tops I gathered strips of paper.
I connected the strip with the Perma Tac.
Using the Raisen’s, I inserted a twig in the opening and tightened the gather strip and adhered it to the top with the Raisen’s.
Some of the tops, I made loose Yo-Yo’s to conceal the openings.
The Perma Tac was instrumental for these.  I adhered the fabric to a piece of plain white paper, before die cutting the fabric.
Perfect cuts, thank to the paper staying adhered to the fabric.
Thank you GLUE ARTS!
Here are the Yo-Yo’s adhered to the tops of these.
Lastly, I took some acorns and acorn tops and some scraps.
Using the Raisen’s again, I adhered the paper to the acorn pieces.
I then gathered an finished these off in the same manner as the items above.
In case you couldn’t guess what I was making, here they all are.
My pumpkins.
I win the mom of the year award for these.
My big kids could not believe they were made out of paper.
My little ones could not get over the cuteness because they are so small.
These make such an eye catching display.
To get an idea how small some of them are, here is my 4 year old, holding her 2 favorite pumpkin babies.
They could almost double as earrings…
 …earrings?  Hmmm….do I dare??
Obviously, these will not be kept outside with the real pumpkins, the overnight moisture would destroy them.
But they sure do look good with the Real thing!
I decided to put them on a plate and display them like this.
One last peek.
 I wouldn’t dare mix with fabric and paper unless the paper is Authentique Paper.
 I am starting to think of all the possibilities of things I can make now that I know I can use Authentique Paper in many of the same ways I use fabric.
Be sure to keep visiting us here on the Authentique Paper Blog to see what all of on the Design Team come up with.
Thank you again to Glue Arts for allowing me to work with their awesome adhesives for this project.
This has been Jeannie with The Polka Cabana with today’s post.
Supplies:
Polka Dot Fabric
Twigs
Glue Gun
Cotton Balls

Authentique Paper “Secret Qualities”

25 Sep
I am so excited to post this tutorial her today.
I am working with the new line of papers called FREE BIRD.
These are 6 x 6 papers that will be sold individually and what is so awesome about them is that they are the same quality as the bigger Authentique Paper 12 x 12 sheets, textured and wonderful!
The buss with the Authentique Paper Design Team right now is that we all love the designs and the papers in this new FREE BIRD series, we almost do not want to use them.
If you are a true paper junkie like me as much as I love double sided paper, it can sometimes cause anxiety in me.  I look at both sides and think, I can’t possibly use ONE side and not the other.  How do you choose which side to use?  I want BOTH.  Today I am sharing one of my BEST KEPT secrets with you.  The textured papers that Authentique Paper produces are such high quality, durable and strong papers you can literally separate the double sided papers into 2 pieces of paper.
Yes…2 completely separate pieces!!
First you are going to need to break down…break down…break down the fibers in the paper.
To do this, I started by putting the sheets of paper through my crimper, over and over again.  About 3o times at least.  After that I just kept bunching it and crumpling it by hand.
It is important to note, I did not wet the paper in any way at all.
When I start seeing the edges are separating, I know I can start taking the pieces apart.
At first I used a spatula to carefully hold the one side down while I tugged on the other side.
But after doing this a couple of times, I found the easiest way is just to very gently separate a small section, rotate, tug, rotate and keep doing this until the pieces are free from each other.
You will end up with 2 intact pieces of paper you can play with.
The other side looks like a fuzzy white piece of cotton.
Here are some other pieces of the FREE BIRD series I have already separated and have cut them in strips.
I uses a small dress form die cut from chipboard as my base.  You can use this single layer of paper almost like it is fabric.  The paper at this point is as flexible as a piece of fabric.  Really!
Here I have made the bodice piece for my tiny dress.
Then I made the ruffles for the skirt.
Here are the pieces all ready to be assembled.
Using hot glue and some imagination, this is how the dress turned out.
I had made a focal point for my card, but it did not show up well as I used the same shades of green for my card base and embellishment, so I decided to make a ruffle to frame my circle embellishment.
I just attached a bunch of strips, end to end and gathered them to make the ruffle you see in this next picture.
The neat thing is, after making this card, I still have pieces left.
Isn’t that awesome?
Who knew you could pretend paper was fabric and sew a dress out of it?(Other than me!)
My point in sharing this is to show you Authentique Paper‘s:
DURABILITY
FUNCTIONALITY
VERSATILITY
POSSIBILITIES, which are endless.
I hope you have enjoyed this tutorial.  Think of how many fun projects you can make with this fun paper and if you use my technique, you can double the amount of projects you make!
Have fun and happy paper crumpling!!!  This has been Jeannie with The Polka Cabana with today’s post.
Products Used:

Sweet Stamps goes Back to School

30 Aug

It is Tuesday which means….It is time to issue another Sweet  Stamps Challenge.

This week we are challenging you with a sketch.

Here it is.

On my card today I have used the very fun stamp called:

Umbrella 244.


You know I love to paper piece and today’ s card is proof.

I have used paper from the Authentique Paper line called Blissful.  You can see all the products for this line here.

For my apples, I just used a heart punch and cut the bottoms off to make them look like apples.

Well, what do you think?  I am rather excited how it turned out, sometimes sketches make me nervous, but not this time!

Now it is your turn!  Head on over to the Sweet Stamps blog and play along with us!

As always you will be playing to win a $20.00 Sweet Stamps.com Gift Certificate!

Have a great Tuesday!


A very PRETTY Sweet Stamps Christmas Card

26 Jul

Wow it is 2am California time and I am just getting this posted!  Even worse?  I have to get up in 2 1/2 hours and go to work:(

We are still doing our Christmas in July theme on the Sweet Stamps.com blog.

This week’s challenge is a sketch challenge.  Here is the sketch.

Remember how I like to be difficult and do things like ROTATE the sketch?  Here is how I did my card, by rotating the sketch this way:

I used 2 different Sweet Stamps:

ORNAMENTS SILHOUETTE AND OUTLINE

HAPPY HOLIDAYS OLD FASHIONED

I also used some paper from my new favorite line, Authentique Paper.

Forgive the lighting on this, remember it is 2am!  The ornaments really are the right hue, even though they look navy blue in this picture!

This particular paper is called:

BRILLIANCE

Here is another shot with different coloring…I will most likely redo these pictures outside tomorrow and replace these pictures.

Notice how I put wire on my ornaments?  I love the way it looks!

I also made those cute flowers by using the shabby rolled technique with paper.  I was soo excited with the way they turned out!

Be sure to head on over to the Sweet Stamps.com blog and see what our other fabulous designers have come up with.

Join our sketch challenge and win your self a Gift Certificate to Sweet Stamps.com!

$20.00 certificate is up for grabs to one random and lucky person!

Good Luck and thanks so much for stopping by!

Friday Fun with Cheery Lynn Designs and Grafix Arts

21 Jul
Today I am going to give you a mini tutorial.
Very mini as I will show you the 1st couple of steps and
then you get to do your own thing past what I share.
I saw this done by
Rhonna Farrer, she calls them Lollipops.
Mine are called CUTE FLOWER ON A STICK!
I am so creative, I just can’t help it!
What makes mine unique is that mine are made with some really fun papers from Grafix Art called:
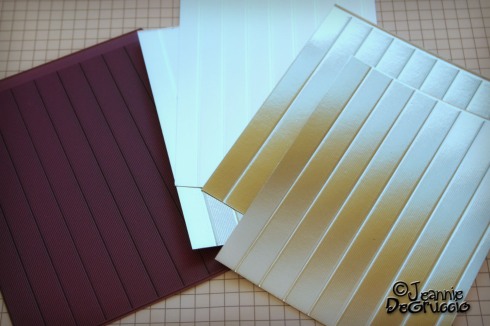
To start the CUTE FLOWER ON A STICK project, you will need some paper cut into 4 x 5 inches. I used 4 pieces of the SILVER METALLIC BOARD.
I also used my Wittle Weaver 1/2″ strip die with the Thin Embossing Pad.

By using the embossing pad, this embosses perfectly measures fold marks for these flowers.
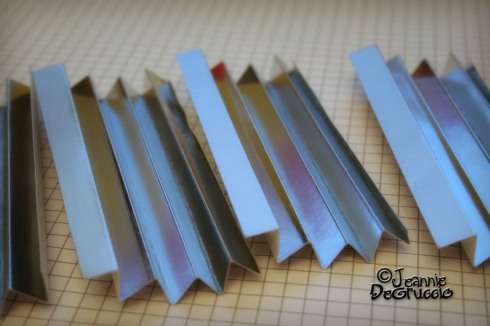
First step, you guessed it, do the accordion fold with all 4 pieces of paper.

Next, fold each accordion in half.
Glue the center seam of each piece to create these fan shapes.

Next glue all four fans together and look a Jello mold!!
Now from here you can do whatever you want, however,
I do not recommend pouring Jello into it!

I used so many dies on this, where do I begin?

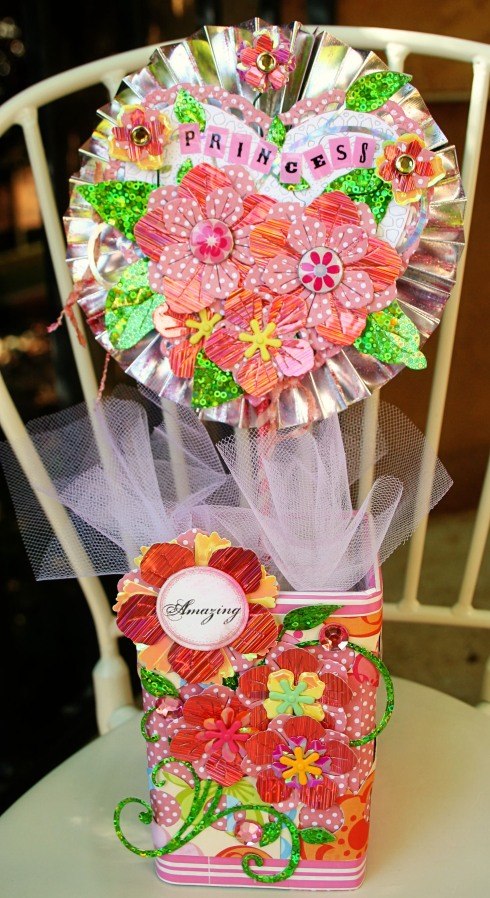
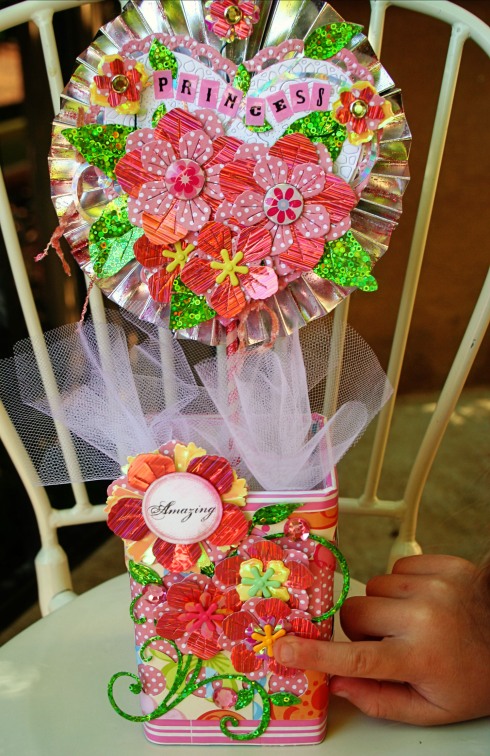
After I got the Silver Flower Base all formed, I started by putting a white HEARTLAND AMERICANA Heart down and then trimmed the white heart with the Polka Dot Pink paper.

After that I used the FANCIFUL FLOURISH and cut it out with the sparkly green FUNKY FILM.


I used an assortment of papers and more sparkly FUNKY FILM that is pinkish peach with the JUDY’S BLOOM die.

I got this cute little box from my local Ben Franklin Craft store. They have these bins that are full of $1.00 items and this little box (originally blue) was one of my finds in the dollar bins.

I covered the box with matching paper and FUNKY FILM flowers. I poured rice in a baggie and made some tulle puffs to disguise the rice.

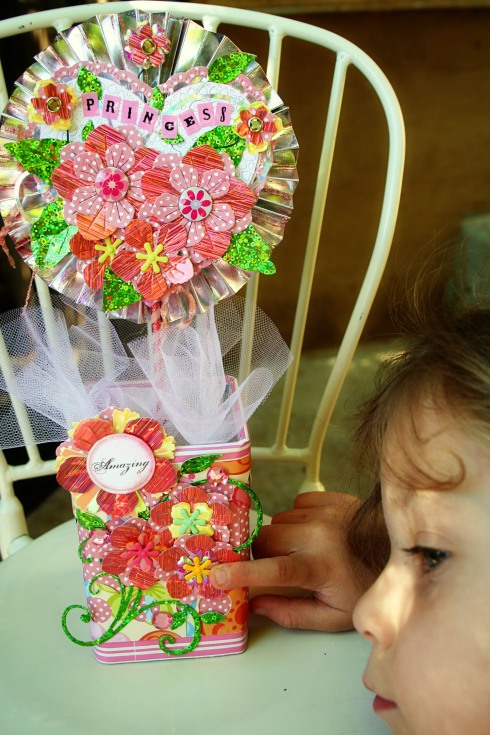
I then stuck my CUTE FLOWER ON A STICK in the rice and created this adorable centerpiece.

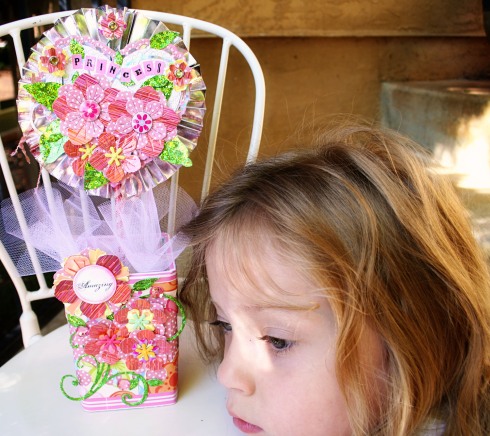
Wouldn’t this be fantastic as a centerpiece for a little princess?
My princess thinks so!
Have a great weekend, be sure to visit us and see what the other Design Team members are up to!
This has been Jeannie with THE POLKA CABANA with your Friday Fun!
Cheery Lynn dies & products used in today’s project:

Does White Space Scare You?

10 Jun

It never ceases to amaze me how something like a blank canvas, a blank card or a blank scrapbook page can send a person into the

“I can’t, I’m so NOT creative” mode.


I firmly believe this is not true for anyone.With a blank piece of paper and a couple of very common simple paper tools, mini works of art are very doable, easy and possible.

Let me show you what I mean. The previous picture is my blank canvas and below are the tools I am using for today’s project.

Pictured are:
MISC STAMPS (My own stash:)
Here is my mini work of art.

I used the Ric Rac as my stems.
The pinwheels are made with squares cut out with the Scalloped Square die.

I used one of the button dies for the center of the pinwheels.

For the final touches, I stamped and paper pieced the stamps.

Lastly I added some dots with different acrylic paints.

So there you have it…a blank piece of WHITE paper, turned into a colorful and whimsical card.
It just takes a little imagination and a lot of pep talk!
Paper is your friend and Cheery Lynn Designers love showing you all the different things you can do with these awesome dies!
I hope you enjoyed my mini lesson. Have a great weekend and hopefully you will time to make something crafty!
This has been Jeannie from THE POLKA CABANA, Ta Ta For Now!

Sweet Stamps.com Anniversary Card

7 Jun

Today, I am so excited to show you my fun card.

It is a new week and Challenge 18 is starting.  The random winner of this challenge will receive a $20.00 gift certificate to Sweet Stamps.com.

The theme of this weeks challenge is:

WEDDING/ANNIVERSARY

The stamps and supplies I have used are:

HAPPY ANNIVERSARY 977C 

LAMBKINS FOR YOU 645 

HEARTLAND AMERICA LARGE DIE DL110 

Here is what I came up with.

Now, when you look at this you might realize that I have the sheep facing one another.  I thought this would be cute for an Anniversary card.

The above image is to give you a closer look at the detail I put into the heart and the floral necklaces on the sheep.

Aren’t they so cute touching noses together?

To do this, I stamped the sheep on plain white paper, then scanned the image onto my computer.  I then turned it into a digital stamp and was able to copy the other sheep and reverse the direction of one of the sheep, so I got this effect.  

 I love the intricate cutwork on the heart I used in the center.  The Heartland America Die is a gorgeous die. 

Now, hopefully I have sparked a new idea for you.  I turned my stamp into a digi stamp, I paper pieced the sheep, I used only a PORTION of the Heartland America Die and I embellished with pearls, glitter and paper pieced flowers.  Just look at all the techniques I am teasing you with!

If you have any questions about a specific technique, be sure to ask me.  You can contact me through the CONTACT ME at the top of my blog page.

I hope yu have enjoyed this card.  It was a ton of fun to make.  Now get on over to SWEET STAMPS.COM blog and play along on our challenge, leave a comment over there making sure that you let them know Jeannie from The Polka Cabana sent you!

Have a great week and thanks for stopping by.

Cheery Lynn Designs, Jewelry?

20 May
You read that title right. Today I am going to show you some simple jewelry and accessories I made with my Oriental Butterfly Doily.
The first step in today’s project was to cut my butterflies out. I cut them out on, Grafix Art Black Shrink film. The film is very thick and strong. Since the doily is very detailed, I chose which holes to punch all the way out. I made sure the butterfly wings were a symmetrical pattern.
Here they are before I started punching out the holes I wanted.

Here they are after I have punched out all the openings I wanted.

With 2 of the completed and cooked butterflies, I made 2 matching hair clips.

I accented them with some rhinestones and they are nice a sparkly for the official FAIRY of the house. The “Magic Fairy Princess” really loves these.

With the remaining butterfly, I made a simple necklace.
This is a jewelry finding meant for cording or ribbon.
That triangle you see pointing up, pierces through the ribbon and holds it in place while you crimp the bead closed.

You can see that there are 2 flaps/sides to this crimping bead.
You take your ribbon and fold it over itself and center it on the sharp middle of the bead.

Once the ribbon in enveloped in the center you crimp one side closed.

Making sure that you are entirely encasing the ribbon, you crimp the other side closed.

Here I am adding some beads and jump rings to center of the necklace, the butterfly.

I attached the ribbon to the butterfly, added a clasp and here is the finished set.

These are very easy to make and a great last minute gift.

To give you an idea of how much the Shrink Film, shrunk, here is a picture of the hair clips with the Oriental Butterfly Doily die.

Here is the PRINCESS with her new bling.

The butterflies are the perfect shape for these hair clips.

The whole ensemble.

Now that I have made these, I have a ton of ideas for the future.

Earrings, bracelets, bookmarks, oh my! I can think of a ton of things I can’t wait to try!

I hope you enjoyed my “NOT PAPER” project today.
Thanks for stopping by and please join us on Sunday for our Butterfly Challenge kickoff!
This has been Jeannie from The Polka Cabana with your Cheery Lynn Designs Butterfly accessories.
Items used in today’s project:

My first Challenge for Tally Scrapper, come play along!

4 May

Now, I know I have been mentioning Tally Scrapper a lot, lately.  Why?  Because they are the BEST challenge blog there is.

I have tried others before, but there is something about the ladies on Tally Scrapper, well you feel like you have found home once you are there.

I entered a challenge to be their  MAY DESIGN STAR and I made it!  I have been working with this GORGEOUS kit I received as the STAR!

Goodness, I am a star!  Here is the link to prove it:

http://www.tallyscrapper.com/blog_view.php?blog_id=794

I am sooooooooo excited!

As I am a star, I am making a card challenge for the ladies.  Here is the LINK to my CHALLENGE.

 http://www.tallyscrapper.com/scrapbook_gallery_challenge.php?challenge_id=1181

I found this wonderful card online, see HERE:

http://1cardcreator.blogspot.com/

She has a tutorial up that is HERE:

http://vintagedragonfly.blogspot.com/2011/05/pop-in-for-pop-up-card.html

Maybe I am tutorially challenged, but I needed MORE!

I thought if I need more instruction, surely one with less card making knowledge than I have, would need MORE too!

So, I have revamped the tutorial to hopefully suit any level of card making skills, that you all have out there.

These are instructions for a card that will measure 5″ wide and 7″ tall.

Start with 2 – 12 x 12 pieces of paper and cut them down to ‘

10 long and 7 inches high.

Score the paper for the CARD FRONT down the middle the 10 inch side at the half way point.

5 inches:)

Then fold.

On the paper for the inside, turn it to the WRONG SIDE and mark your middle point.

If you have a score board, line your MIDDLE POINT  up with the word CENTER on the score board.

score lightly down the center.

Now, on that card center line you just scored, mark 1 1/2′ from each edge.

Then be sure to make those marks longer lines, like this.

The reason why, once you get a punch in there, you will want the hole you punch to be horizontally straight, the line help you line the punch up easily.

You will take you punch, like this one and only cut half the length of the punch out.

When done, you folded in half paper will look like this.

Here is what it looks like open, with the wrong side facing up.

Here is what you want to do next…you want the are in-between the cut out punches to fold along the score line going in,

like you are tucking that portion of the paper in while folding in half.

Here is a side view of what is happening to that center portion.

Now, glue with a ATG gun type glue the WRONG SIDES together or your card.

Here one side is done, I am getting ready to put the adhesive on the other side. (The white paper)

The pink indicates where I have applied the adhesive.

Here are all my butterflies cut out ready to go.

I have used my CHEERY LYNN DESIGNS dies.

BUTTERFLY BUNDLES

ORIENTAL BUTTERFLY DOILY

Spray them all to make them shimmery!

Now fold about 1/2 inch on the right side of what ever image you are using.  Stamps, paper, dies what ever it is.

Here is the butterfly, wrong side up with it’d folded part showing. Put your adhesive on that folded up side.  The adhesive goes on the part of the butterfly that would be considered RIGHT SIDE.

Adhesive is on the far left side that is facing out towards the left of the picture.

Take that adhesive edge and stick it down to that CENTER PORTION that pops up.

Add another large image, here I applied a tab to help with the glue, since I am using a design with so many openings.

Now, personally I was bothered how the weight of the butterflies, and I would assume anything you use, kept flopping forward to the right side of the card.

Thus, obstructing the view of anything I might want to place there.

My solution was to fold 1/4″ strips of paper in zig zag fashion and attach them to the back of  my images and the Left side of the Card.

You can see in a couple of images down, how these work.

Finished card front, nothing magic, just decorate the front.

I am again using items from the fabulous MAY TALLY KIT.

Here is the inside of the card.

A close-up.

Here  you can see the anchors on the backs of my pop-ups.

Another view of how the whole pop up works.

Once again, the finished product.

Now for those of you who are on Tally, or want to join, I am hosting a challenge for you to use this tutorial and make one of these cards however you want to!

The winner of the challenge, (done with TALLY POINTS) will win this

toTALLY awesome BUTTERFLY SET.

Valued at $24.95

The only catch is you have to do it the TALLY way!

So, go join up on Tally Scrapper and play along!